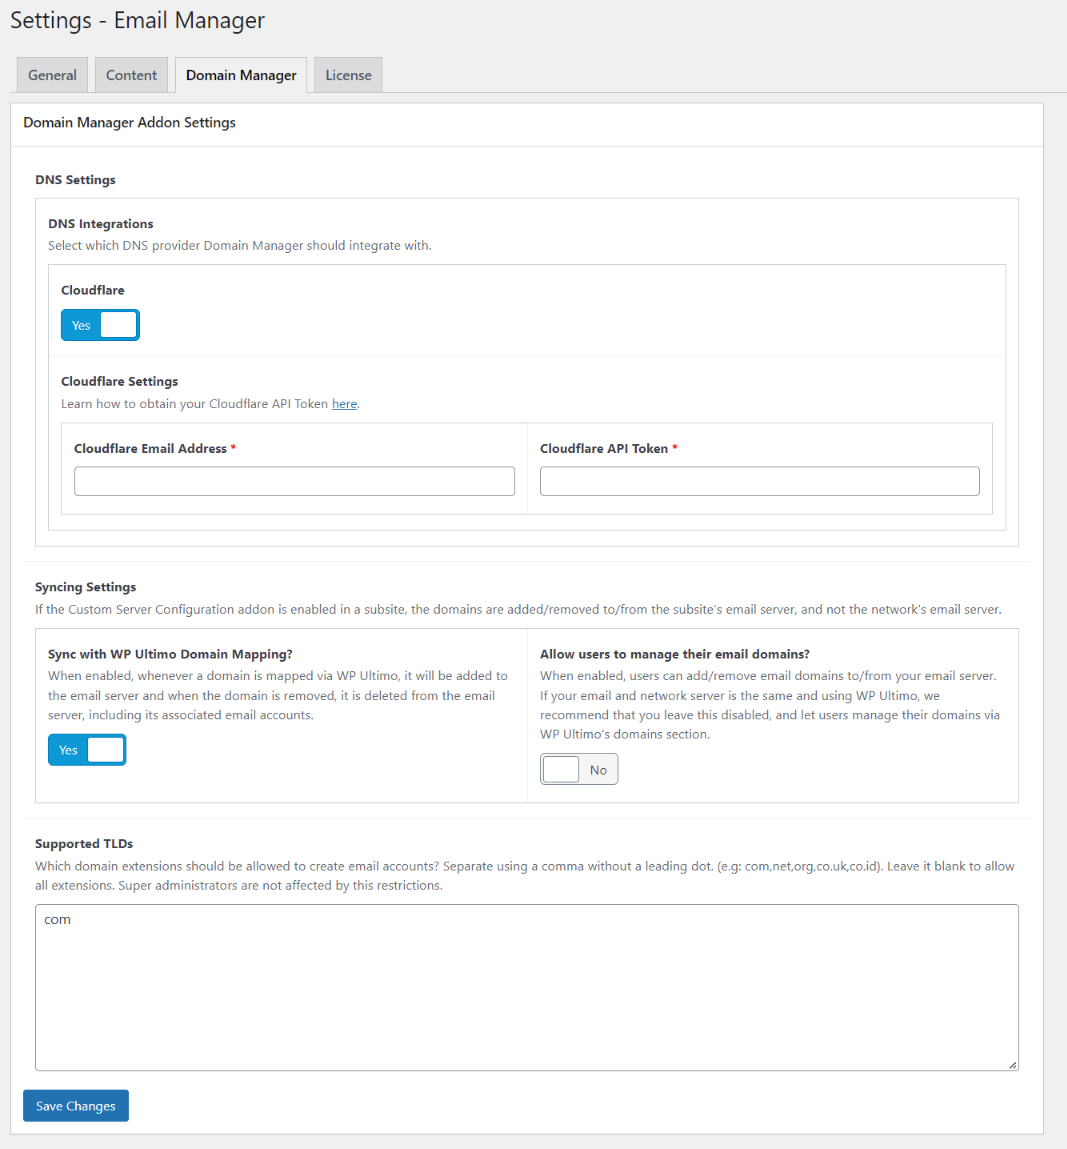
The addon’s settings can be accessed from Email Manager > Settings > Domain Manager.
Some fields may or may not be present depending on your WordPress setup and Domain Manager Addon activation ( i.e. multisite, single WordPress Install, network plugin activation e.t.c).

1. DNS Settings
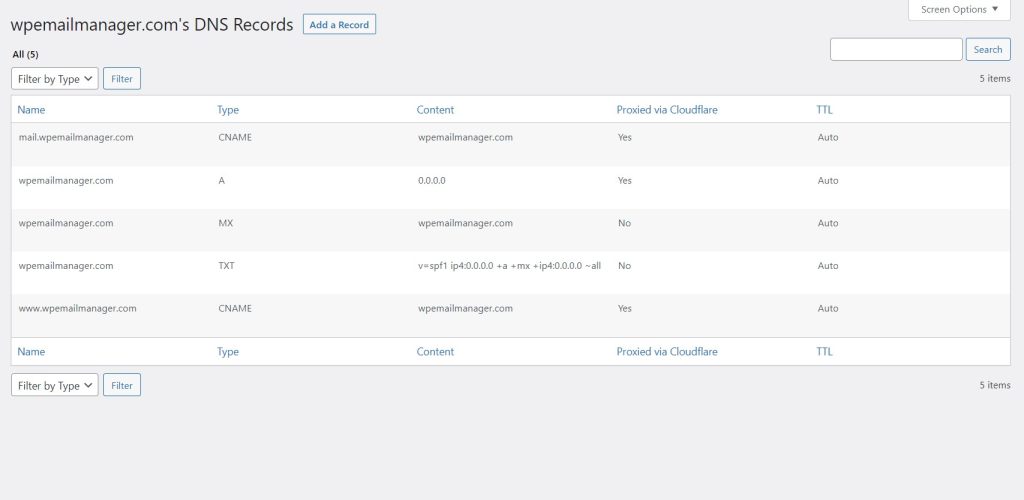
The DNS settings enable the functionality of managing a domain’s DNS records directly from WordPress. Once enabled, you will be able to view and manage records of a specific domain as shown below.

The addon integrates with the following, and more providers will be included soon:
- Cloudlfare – Manage your domain’s Cloudflare records from WordPress.
2. Syncing Settings
NOTE: If the Custom Server Configuration addon is enabled in a subsite, the domains are added/removed to/from the subsite’s email server, and not the network’s email server.
Sync with WP Ultimo Domain Mapping
When enabled, whenever a domain is mapped via WP Ultimo, it will be added to the email server and when the domain is removed, it is deleted from the email server, including its associated email accounts.
Allow subsite administrators to manage their own email domains
When enabled, users can add/remove email domains to/from your email server.
If your email and network server is the same and using WP Ultimo, we recommend that you leave this disabled, and let users manage their domains via WP Ultimo’s domains section.
3. Supported TLDs
With the domain manager addon, you can limit the domain tlds that can create email accounts on your platform.
Enter the tlds that should be supported separated by a comma without a leading dot. (e.g: com,net,org,co.uk,co.id). Leave it blank to allow all extensions. Super administrators are not affected by these restrictions.


